I love recipes that require little work and yet achieve impressive results.
Can you believe that this beautiful boule of bread:
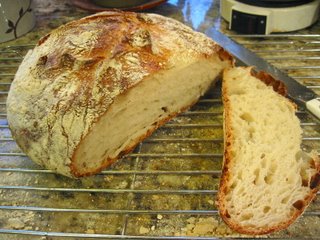
came out of my oven and was ridiculously easy to make?
I'm probably the last food blogger on the planet to have tried the No-Knead Bread that Mark Bittman wrote about in the NY Times. It was just hard to believe that sloth-dom could be so incredibly rewarding.
There's
a fun video how-to with Bittman that takes all of 5 minutes of your time to watch. (Unfortunately the sound card on my computer has been scrambled, but it is still fun to watch as a mime show!) And really making the bread itself doesn't take much more than that in active time. Zingerman's has got to be bumming about this recipe, since it will certainly cut down on my consumption of their bread. Sure, I'll still go get a loaf when I don't plan ahead 24 hours, but despite my deficits in the organizing department, the reward is so great (house perfumed with hot bread! a steamy hot loaf on which to slather butter!) that it will serve as an incentive to get my act together, at least in the bread department.
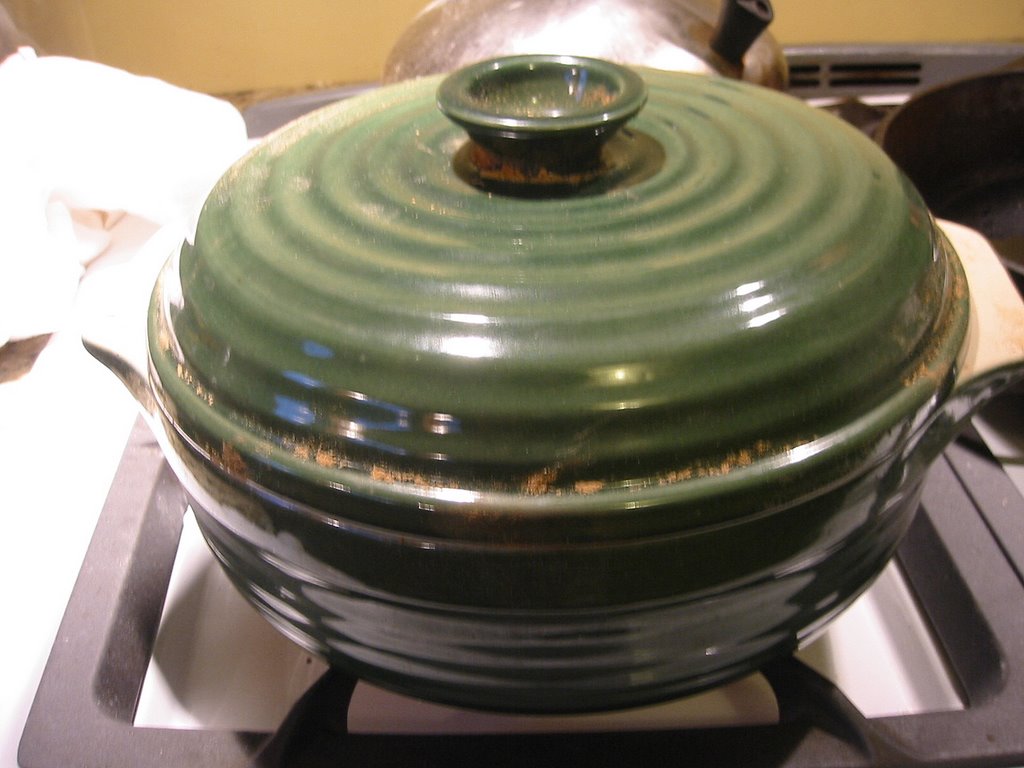
Based on the other blogs I've read that commented on the recipe, I added a little more salt (I dislike unsalted bread) and used a smaller 3 qt pot in which to bake the bread. You don't have to have a $200 Le Creuset enameled Dutch oven to make this; my much more humble
Emile Henri ceramic covered casserole worked great:

I also found that the recipe is pretty darn forgiving for those of us who need even more than the requested 12-18 hours of rising time to laze around. If, say, you keep your house at a normal temperature, you might want to follow the directions more closely, but as I am part lizard and don't mind a slightly cool house (hey, why do you think I knit sweaters?), bread dough needs more time to rise and cooperate in my chilly environs.
So really, go get out some flour, water, salt and a teeny bit of yeast and mix up a bowl. Then forget about it and come back to it tomorrow and you can have fantastic hot bread with almost no effort. A sloth's paradise!
Adapted from Jim Lahey, Sullivan Street Bakery
Time: About 1 1/2 hours plus 14 to 24 hours’ rising
3 cups all-purpose or bread flour, more for dusting
1/4 teaspoon instant yeast
1 1/2 teaspoons salt
Cornmeal or wheat bran as needed.
1. In a large bowl combine flour, yeast and salt. Add 1 5/8 cups water, and stir until blended; dough will be shaggy and sticky. (I added more than 1 5/8 cups, but then I think I over generously scooped my flour.) Cover bowl with plastic wrap. Let dough rest at least 12 hours, preferably about 18, at warm room temperature, about 70 degrees. (I let mine rise almost 20 hours at cold room temperature--61 degrees.)
2. Dough is ready when its surface is dotted with bubbles. Lightly flour a work surface and place dough on it; sprinkle it with a little more flour and fold it over on itself once or twice. Cover loosely with plastic wrap and let rest about 15 minutes.
3. Using just enough flour to keep dough from sticking to work surface or to your fingers, gently and quickly shape dough into a ball. Generously coat a cotton towel (not terry cloth) with flour, wheat bran or cornmeal; put dough seam side down on towel and dust with more flour, bran or cornmeal. (I used flour this time; I think I'll try cornmeal next time.) Cover with another cotton towel and let rise for about 2 hours. (Again, in my cold house, on my cold granite counter tops, I let it rise for 4 1/2 hours) When it is ready, dough will be more than double in size and will not readily spring back when poked with a finger.
4. At least a half-hour before dough is ready, heat oven to 450 degrees. Put a 3-quart heavy covered pot (cast iron, enamel, Pyrex or ceramic) in oven as it heats (the original recipe calls for a 6 to 8 quart pot, but pretty much all the food blogs I've read say they prefer the smaller pot which gives you a rounder loaf. If you want it wide and flatter, go for the bigger pot). When dough is ready, carefully remove pot from oven. Slide your hand under towel and turn dough over into pot, seam side up; it may look like a mess, but that is O.K. Shake pan once or twice if dough is unevenly distributed; it will straighten out as it bakes. Cover with lid and bake 30 minutes, then remove lid and bake another 15 minutes, until loaf is beautifully browned. Cool on a rack.
Yield: One 1 1/2-pound loaf.
 Lentil Soup with Pounded Walnuts and Creme Fraiche